DIY Caramel Apples Bar Fun For All
Caramel apples are a fall classic, but making them yourself can be a delightful family activity. Setting up a DIY Caramel Apples Bar takes this tradition a step further, turning a simple treat into a fun, interactive experience. Imagine a crisp autumn afternoon, the scent of apples and warm caramel filling the air, as everyone gathers to customize their own perfect caramel apple. This bar allows for endless creativity, with a variety of dips and toppings to suit every preference. It’s not just about eating a caramel apple; it’s about the joy of making something special, together. Ingredients: Apples: Granny Smith or Honey Crisp Dips: Melted caramel candies (use good quality melting caramels, they’ll be much smoother and easier to work with), milk chocolate sauce, white chocolate sauce, melted Reese’s peanut butter cups Toppings: Sprinkles (Heath toffee bits, crushed pretzels, crushed pecans, mini marshmallows, mini M&Ms) Preparing the Apples The first step is selecting your apples. Granny Smith apples are tart and firm, providing a wonderful contrast to the sweet caramel. Honey Crisp apples are also a fantastic choice for their crisp texture and balanced sweetness. You’ll want about one apple per person, or maybe an extra one for good measure, as these can be quite addictive! Before you start dipping, wash your apples thoroughly and dry them completely. This is a really important step. Any moisture on the apple skin will prevent the caramel from stickin
DIY Caramel Apples Bar
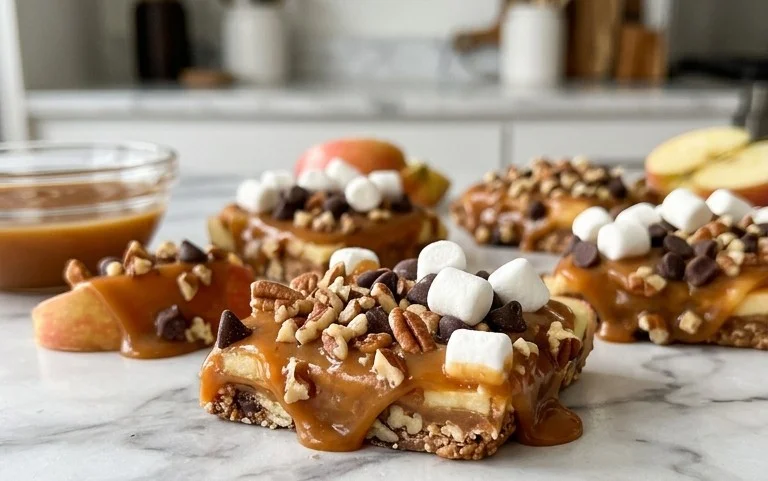
Caramel apples are a fall classic, but making them yourself can be a delightful family activity. Setting up a DIY Caramel Apples Bar takes this tradition a step further, turning a simple treat into a fun, interactive experience. Imagine a crisp autumn afternoon, the scent of apples and warm caramel filling the air, as everyone gathers to customize their own perfect caramel apple. This bar allows for endless creativity, with a variety of dips and toppings to suit every preference. It’s not just about eating a caramel apple; it’s about the joy of making something special, together.
Ingredients:
- Apples: Granny Smith or Honey Crisp
- Dips: Melted caramel candies (use good quality melting caramels, they’ll be much smoother and easier to work with), milk chocolate sauce, white chocolate sauce, melted Reese’s peanut butter cups
- Toppings: Sprinkles (Heath toffee bits, crushed pretzels, crushed pecans, mini marshmallows, mini M&Ms)
Preparing the Apples
The first step is selecting your apples. Granny Smith apples are tart and firm, providing a wonderful contrast to the sweet caramel. Honey Crisp apples are also a fantastic choice for their crisp texture and balanced sweetness. You’ll want about one apple per person, or maybe an extra one for good measure, as these can be quite addictive! Before you start dipping, wash your apples thoroughly and dry them completely. This is a really important step. Any moisture on the apple skin will prevent the caramel from sticking properly, and you’ll end up with a sloppy mess. Once they’re clean and dry, insert a sturdy stick into the stem end of each apple. You can use wooden popsicle sticks, but for a more secure hold, especially with heavier toppings, lollipop sticks or even small wooden dowels work wonderfully. Push the stick in about halfway through the apple so it has a good grip.
Melting the Dips
This is where the magic happens! You’ll need a few different dipping options. For the classic caramel, unwrap your caramel candies. You can melt them in a saucepan over low heat, stirring constantly to prevent scorching, or in the microwave. If using the microwave, melt them in 30-second intervals, stirring well after each interval until they are completely smooth and pourable. Add a tablespoon or two of heavy cream or a splash of milk to the caramel as it melts to make it a bit thinner and easier to dip. This also makes it creamier. For the chocolate sauces, you can buy pre-made sauces or melt chocolate chips. If melting chips, use a double boiler method or the microwave, just like the caramels. For the Reese’s peanut butter cups, unwrap them and melt them similarly. These can be a bit thicker, so you might need to add a touch of vegetable oil or shortening to help them along. It’s a good idea to melt each dip in a separate heatproof bowl or a small saucepan. Keep them warm over very low heat or in a warming drawer if you have one, but don’t let them get too hot, or they could scorch.
Setting Up the Topping Stations
The fun part for your guests is the toppings! Prepare all your toppings in advance. You’ll want them in small bowls or containers that are easy for dipping.
For the Heath toffee bits, you can buy them pre-crushed or crush them yourself in a zip-top bag with a rolling pin.
Crushed pretzels add a salty crunch. Again, crush them to your desired coarseness.
Crushed pecans offer a nutty flavor and texture. If you have whole pecans, you can chop them finely.
Mini marshmallows are a sweet, airy addition.
Mini M&Ms provide a pop of color and chocolatey crunch.
Having a variety of textures and flavors ensures everyone can create their dream caramel apple. You might also consider offering some chopped nuts like walnuts or even some edible glitter for extra sparkle.
The Dipping and Decorating Process
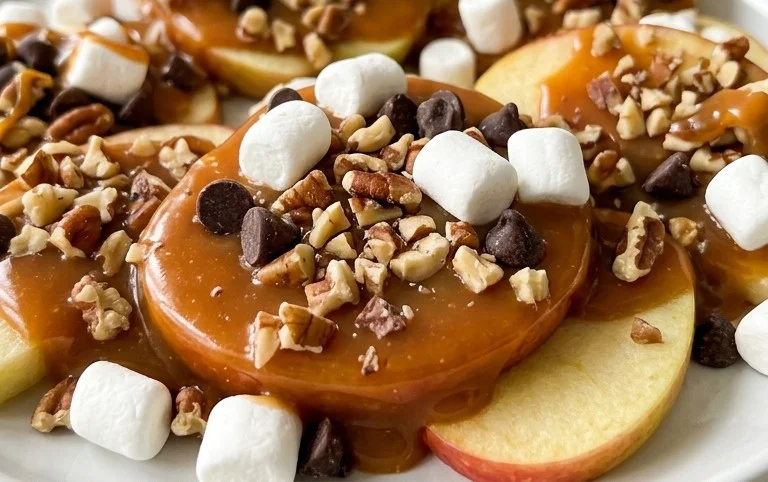
Now it’s time to assemble! Have your bowls of warm dips and containers of toppings ready. One person at a time can take an apple. Dip the apple into the warm caramel, tilting the bowl and rotating the apple to coat it evenly. Let any excess caramel drip back into the bowl. Be careful not to overfill the bowl, as this can make dipping difficult. If the caramel is too thick, you can gently stir in a tiny bit more cream. Once it’s coated, let it drip for a few seconds. Then, quickly roll the sticky apple in your chosen toppings, pressing gently to adhere them. You can go for a single topping or a delightful combination. For example, dip in caramel, then roll in crushed pecans, and then drizzle with melted milk chocolate. Or, try white chocolate, followed by mini M&Ms and crushed pretzels. Work quickly, as the caramel will start to set.
Setting and Serving
Once your apples are decorated, you need to let them set. The best way to do this is to place them on parchment paper or wax paper-lined baking sheets. This prevents them from sticking to the surface. If you have space in the refrigerator, you can place them there for about 15-30 minutes to speed up the setting process. However, if you’re aiming for that classic firm caramel shell, letting them set at room temperature for a couple of hours is ideal. You want the caramel to be firm but not rock hard. Avoid leaving them out for too long in a warm room, as the caramel can become soft and gooey again. If you plan to store them for longer than a few hours, they are best kept in an airtight container in the refrigerator, though they may lose a bit of their crispness.
Tips for Success
Keep your dips warm, but not too hot. If they get too hot, they can become oily. If they get too cool, they will thicken and become difficult to work with. Stir your dips occasionally to maintain a smooth consistency. Have a designated “setting zone” with parchment paper ready. Don’t be afraid to get a little messy – that’s part of the fun! If you find the caramel is not sticking well to your apples, try dipping them in a very thin layer of melted chocolate first, letting it set slightly, and then dipping in the caramel. This creates a better ‘glue’. For those who are very sensitive to sweetness, a dark chocolate dip or a sprinkle of sea salt on top can offer a more balanced flavor profile. Enjoy your delicious, homemade caramel apples!
Conclusion:
Setting up a DIY Caramel Apples Bar is a wonderfully engaging activity for any gathering, especially during the fall or for Halloween parties. It’s a chance for everyone, kids and adults alike, to get creative and make their own delicious treat. The simple act of choosing their apple, dipping it just right, and then piling on their favorite toppings makes for a memorable experience. You’ve got your crisp apples, your gooey caramel, and a whole spread of textures and flavors – from crunchy nuts and pretzels to sweet chocolate and candy bits. Don’t be afraid to get creative with your own topping ideas too; chopped cookies, shredded coconut, or even a drizzle of different sauces can add another layer of fun. Serve them fresh off the bar for the best texture, or wrap them in cello bags for guests to take home as party favors.
Frequently Asked Questions
How do I get the caramel to stick to the apples?
The most important things are washing the apples well and drying them completely. Any wax or moisture on the apple skin will make the caramel slide off. Giving the caramel-dipped apples a moment to set in the fridge also helps them firm up before adding toppings.
Can I make the caramel myself instead of using melting candies?
Absolutely! If you’re comfortable making caramel from scratch, you can certainly use that. Just make sure it’s at the right consistency for dipping – thick enough to coat the apple but still pourable. You might need to adjust the cooking time or add a bit more cream to get it just right for dipping.
What are the best apples for caramel apples?
Firm, crisp apples work best. Granny Smith offers a nice tartness that cuts through the sweetness. Honeycrisp, Fuji, and Gala are also great choices because they hold their shape well and have a good balance of sweetness and crunch.
DIY Caramel Apples Bar
Create a fun and delicious DIY Caramel Apples Bar with a variety of apples, decadent dips, and exciting toppings for a customizable sweet treat.
Ingredients
-
6-8 Granny Smith or Honey Crisp apples
-
1 bag (14 oz) melted caramel candies
-
1/2 cup milk chocolate sauce
-
1/2 cup white chocolate sauce
-
1 cup melted Reese’s peanut butter cups
-
1/4 cup sprinkles
-
1/4 cup Heath toffee bits
-
1/4 cup crushed pretzels
-
1/4 cup crushed pecans
-
1/4 cup mini marshmallows
-
1/4 cup mini M&Ms
Instructions
-
Step 1
Wash and thoroughly dry the apples. Insert popsicle sticks or sturdy skewers into the stem end of each apple. -
Step 2
Prepare the dips: Melt the caramel candies according to package directions. Warm the milk chocolate sauce, white chocolate sauce, and melted Reese’s peanut butter cups in separate heatproof bowls. -
Step 3
Set up the toppings in individual bowls for easy access. -
Step 4
One at a time, dip each apple into your chosen melted dip, tilting to coat evenly. Allow excess dip to drip off. -
Step 5
Immediately after dipping, roll the apple in your desired toppings, pressing gently to adhere. -
Step 6
Place the decorated caramel apples on parchment paper or a silicone baking mat to set. Refrigerate for about 15-20 minutes, or until firm.
Important Information
Nutrition Facts (Per Serving)
It is important to consider this information as approximate and not to use it as definitive health advice.
Allergy Information
Please check ingredients for potential allergens and consult a health professional if in doubt.